 |  |  |
The Chattanooga Bluebird Society is combining community engagement, citizen science, and education to protect and restore bluebird populations in our area. The mission of this entirely volunteer-driven nonprofit is accomplished through the development of nesting habitat, data collection, and public education initiatives. At the heart of the organization’s work lies a commitment to the restoration of declining bluebird and native cavity nesting bird populations across Hamilton County. Launched in the spring of 2021 under the leadership of CBS president Diane Shelly, the organization has grown to over 130 members, all driven by a collective passion for avian conservation.
Inspired by a Zoom talk delivered by Don Hazel, president of the Tennessee Bluebird Society, the Chattanooga Bluebird Society took flight. “We realized that many of us on the call were from Chattanooga, which, at the time, did not have a chapter. During an initial organizational meeting, 15 interested people showed up, and the Chattanooga Bluebird Society (originally called the Tri-State Bluebird Society), chapter of the Tennessee Bluebird Chapter, was launched,” explained Shelly.
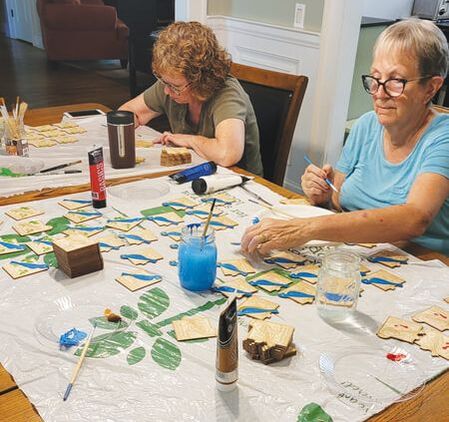
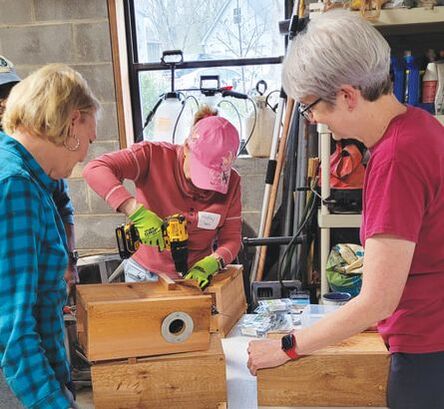
The organization’s first birdhouses were built by a group of 30 volunteers with wood donated by the City of Red Bank. Those first houses found a home in White Oak Park in Red Bank, marking the beginning of an ongoing effort to establish birdhouse trails in public spaces. To date, Chattanooga Bluebird Society has successfully constructed over 22 trails, totaling 150 birdhouses, and has sold hundreds of birdhouses to homeowners. Their unique approach ensures that for every two houses sold to individuals, a free birdhouse is installed on a public trail.
Every week during the nesting season, Chattanooga Bluebird Society’s member volunteers monitor and collect data from each of the trail birdhouses. They open the boxes, count eggs, hatchlings, and fledglings, and report their findings to the North American Bluebird Society. In the spring of 2024, the organization will utilize a new app, streamlining data reporting to the Cornell Lab of Ornithology. Ms. Shelly regularly emphasizes, “We’re citizen scientists!” highlighting the role this sentiment plays at the core of the Chattanooga Bluebird Society.
The impact of Chattanooga Bluebird Society’s efforts is evident in the results of their 2023 monitoring efforts, revealing a total of 746 fledglings - a 50 percent increase compared to the previous year. Notably, at Chester Frost Park in Hixson, 98 bluebird eggs resulted in 91 fledglings, all from just 10 strategically placed birdhouses.
Education is also a key element of Chattanooga Bluebird Society’s efforts, particularly targeting younger generations. The organization recently launched a new partnership with the City of Chattanooga Parks Department’s Youth Stewardship Program, supporting students from the Orchard Knob community in building birdhouses. These birdhouses will be installed on the grounds of the Carver Community Center, with the students actively monitoring them during the upcoming nesting season. “Education about bluebirds and the other cavity nesting birds that use the birdhouses is very important to the organization, and there’s no better place to start than with children,” says Shelly.
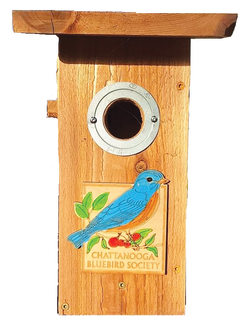
As the nesting season approaches, Chattanooga Bluebird Society emphasizes the importance of maintaining birdhouses to provide nesting sites for bluebirds and other cavity nesting birds. For those interested in supporting the organization’s mission, purchasing a birdhouse is an easy and fun way to contribute. You can even report the data from your personal birdhouse to the organization for its annual count. The complete system, consisting of a cedar house, mounting pole, predator guard, and rebar for installation, is available for $60 plus tax. Additionally, Shelly encourages individuals to get involved by becoming a member, offering the opportunity to join a monitoring team for an annual fee of $20. Those interested in purchasing a birdhouse or becoming a member should contact the organization via email at [email protected].
by Taylor Hixson
Inspired by a Zoom talk delivered by Don Hazel, president of the Tennessee Bluebird Society, the Chattanooga Bluebird Society took flight. “We realized that many of us on the call were from Chattanooga, which, at the time, did not have a chapter. During an initial organizational meeting, 15 interested people showed up, and the Chattanooga Bluebird Society (originally called the Tri-State Bluebird Society), chapter of the Tennessee Bluebird Chapter, was launched,” explained Shelly.
The organization’s first birdhouses were built by a group of 30 volunteers with wood donated by the City of Red Bank. Those first houses found a home in White Oak Park in Red Bank, marking the beginning of an ongoing effort to establish birdhouse trails in public spaces. To date, Chattanooga Bluebird Society has successfully constructed over 22 trails, totaling 150 birdhouses, and has sold hundreds of birdhouses to homeowners. Their unique approach ensures that for every two houses sold to individuals, a free birdhouse is installed on a public trail.
Every week during the nesting season, Chattanooga Bluebird Society’s member volunteers monitor and collect data from each of the trail birdhouses. They open the boxes, count eggs, hatchlings, and fledglings, and report their findings to the North American Bluebird Society. In the spring of 2024, the organization will utilize a new app, streamlining data reporting to the Cornell Lab of Ornithology. Ms. Shelly regularly emphasizes, “We’re citizen scientists!” highlighting the role this sentiment plays at the core of the Chattanooga Bluebird Society.
The impact of Chattanooga Bluebird Society’s efforts is evident in the results of their 2023 monitoring efforts, revealing a total of 746 fledglings - a 50 percent increase compared to the previous year. Notably, at Chester Frost Park in Hixson, 98 bluebird eggs resulted in 91 fledglings, all from just 10 strategically placed birdhouses.
Education is also a key element of Chattanooga Bluebird Society’s efforts, particularly targeting younger generations. The organization recently launched a new partnership with the City of Chattanooga Parks Department’s Youth Stewardship Program, supporting students from the Orchard Knob community in building birdhouses. These birdhouses will be installed on the grounds of the Carver Community Center, with the students actively monitoring them during the upcoming nesting season. “Education about bluebirds and the other cavity nesting birds that use the birdhouses is very important to the organization, and there’s no better place to start than with children,” says Shelly.
As the nesting season approaches, Chattanooga Bluebird Society emphasizes the importance of maintaining birdhouses to provide nesting sites for bluebirds and other cavity nesting birds. For those interested in supporting the organization’s mission, purchasing a birdhouse is an easy and fun way to contribute. You can even report the data from your personal birdhouse to the organization for its annual count. The complete system, consisting of a cedar house, mounting pole, predator guard, and rebar for installation, is available for $60 plus tax. Additionally, Shelly encourages individuals to get involved by becoming a member, offering the opportunity to join a monitoring team for an annual fee of $20. Those interested in purchasing a birdhouse or becoming a member should contact the organization via email at [email protected].
by Taylor Hixson


 RSS Feed